Multi-label Model Deployment
This tutorial demonstrates how to use Cleanlab Studio to train a model on a multi-label dataset and deploy it in a single click. Using the deployed model, you can make predictions on new data points in the Cleanlab Studio web app. The same steps can also be used to deploy models for multi-class datasets. Model inference is also supported through the Python API.

We will use the the GoEmotions dataset (link, which contains Reddit comments tagged with one or more emotions like “love” or “gratitude”.
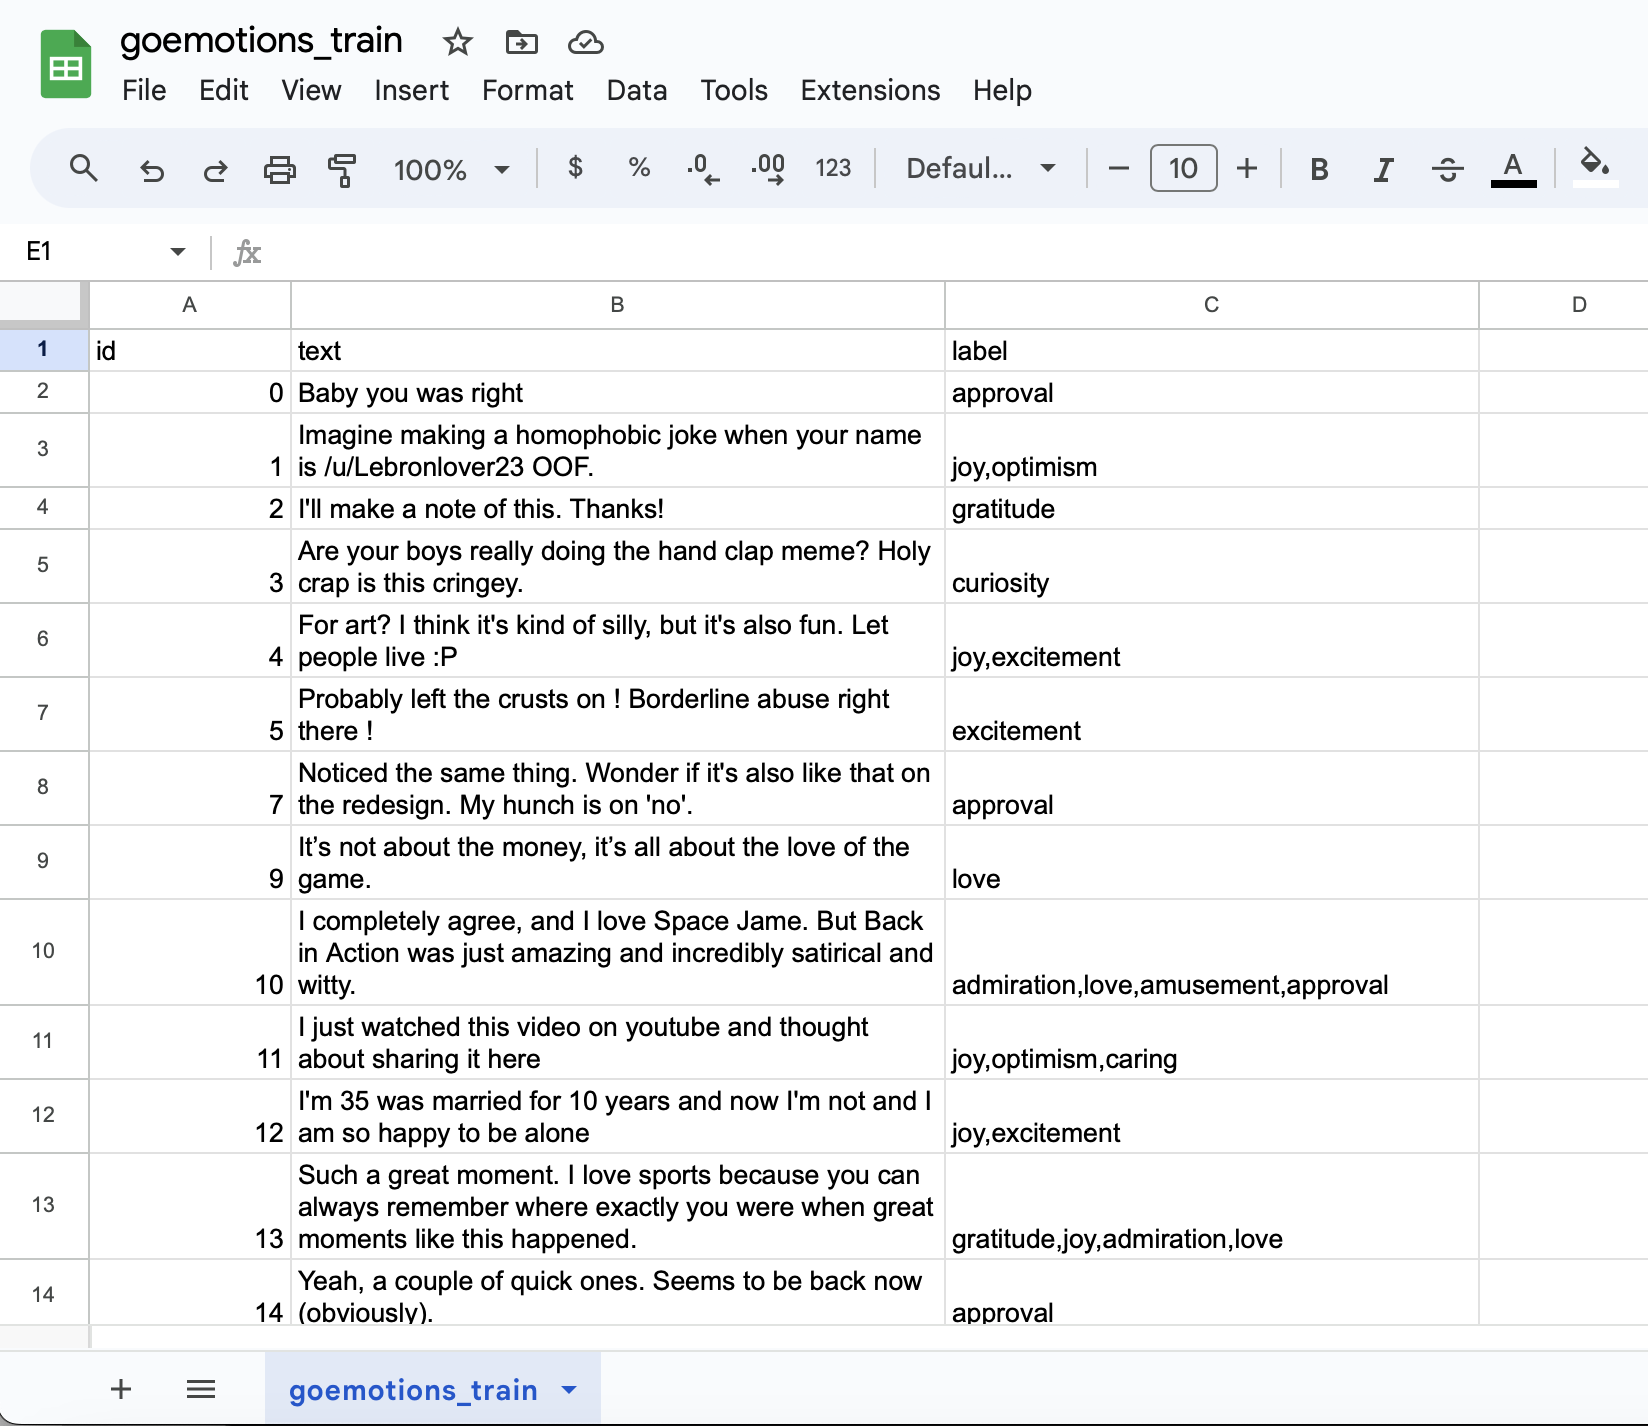
Below is what the dataset looks like. The important columns are the text column, which has the comment texts, and the label column, which has comma-separated strings containing the labels. The labels indicate the sentiments associated with the comment. Some data points can have more than one associated sentiment, e.g. “admiration,gratitude”.

We will train a model that takes the text column as input and predicts the associated sentiment labels. We will use a train-test split to demo model inference. You can download the test data here.
We renamed the downloaded training dataset created above to goemotions_train.csv, and now we upload the dataset to Cleanlab Studio and create a project. This step can also be accomplished through the Python API.
The project creation step is shown in the video below. Since the main predictive column is the column text only, we choose to train a text model with text as the text column. If you have a tabular dataset (with multiple predictive columns), you should train a tabular model instead.
Once the project completes, you can use the web interface to fix any issues you see (see this guide for how to fix issues), and deploy a model by clicking the Deploy Model button at the bottom of your project.
Since fixing issues is not the focus of this tutorial, we will simply use the Clean Top K button to auto-fix the issues, and then deploy a model on the cleaned data. These steps are shown in the video below.
Warning: in general, we do not recommend blindly auto-fixing the entire dataset; generally, a human-in-the-loop approach gives superior results.
Once the deployed model finishes training, we are ready to create the test dataset to be used for inference. As for the test dataset goemotions_test.csv, so we will create a new file for these rows with their labels removed. These steps are shown in the video below.
With the test dataset created, we can use the deployed model to run inference by clicking the Predict New Labels button, as shown below.
Note: If you run model inference on a large test dataset and experience errors, split the test data into multiple batches and separately run inference on each batch.
Finally, when inference finishes, we can click export and get the predicted probabilities and suggested labels for our test dataset, as shown below.
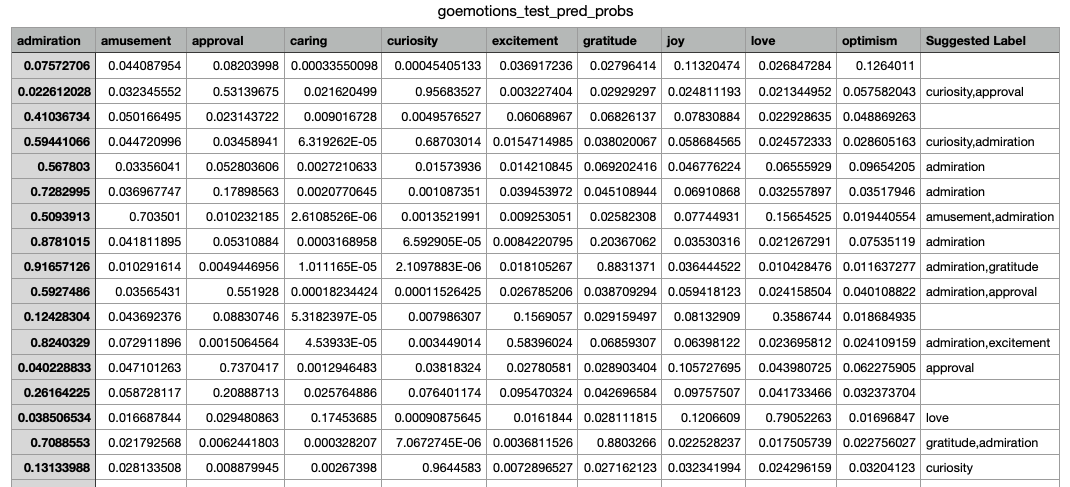
The final exported results can be seen in the screenshot below.

As shown, the result contains a column for each label, showing the predicted probability of that label being present. There is also a Suggested Label column, which contains the likely labels for a data point, gathered in a comma-separated string.
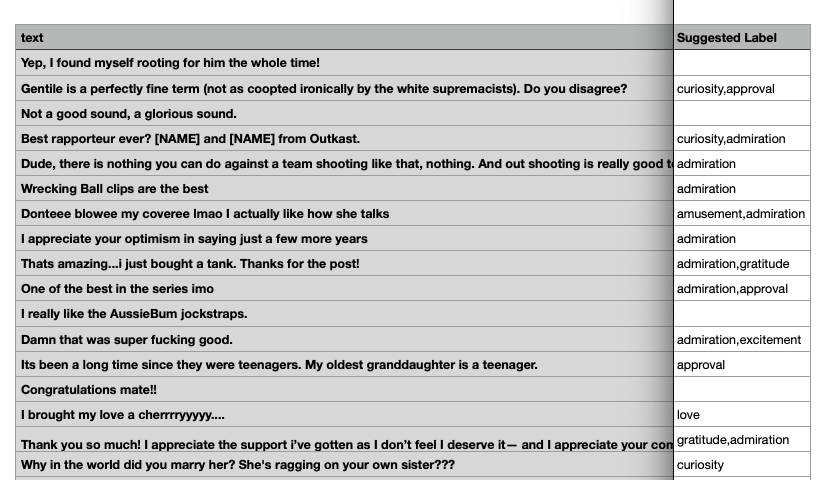
Here is a screenshot that shows the first few of the test examples, along with their Suggested Label.

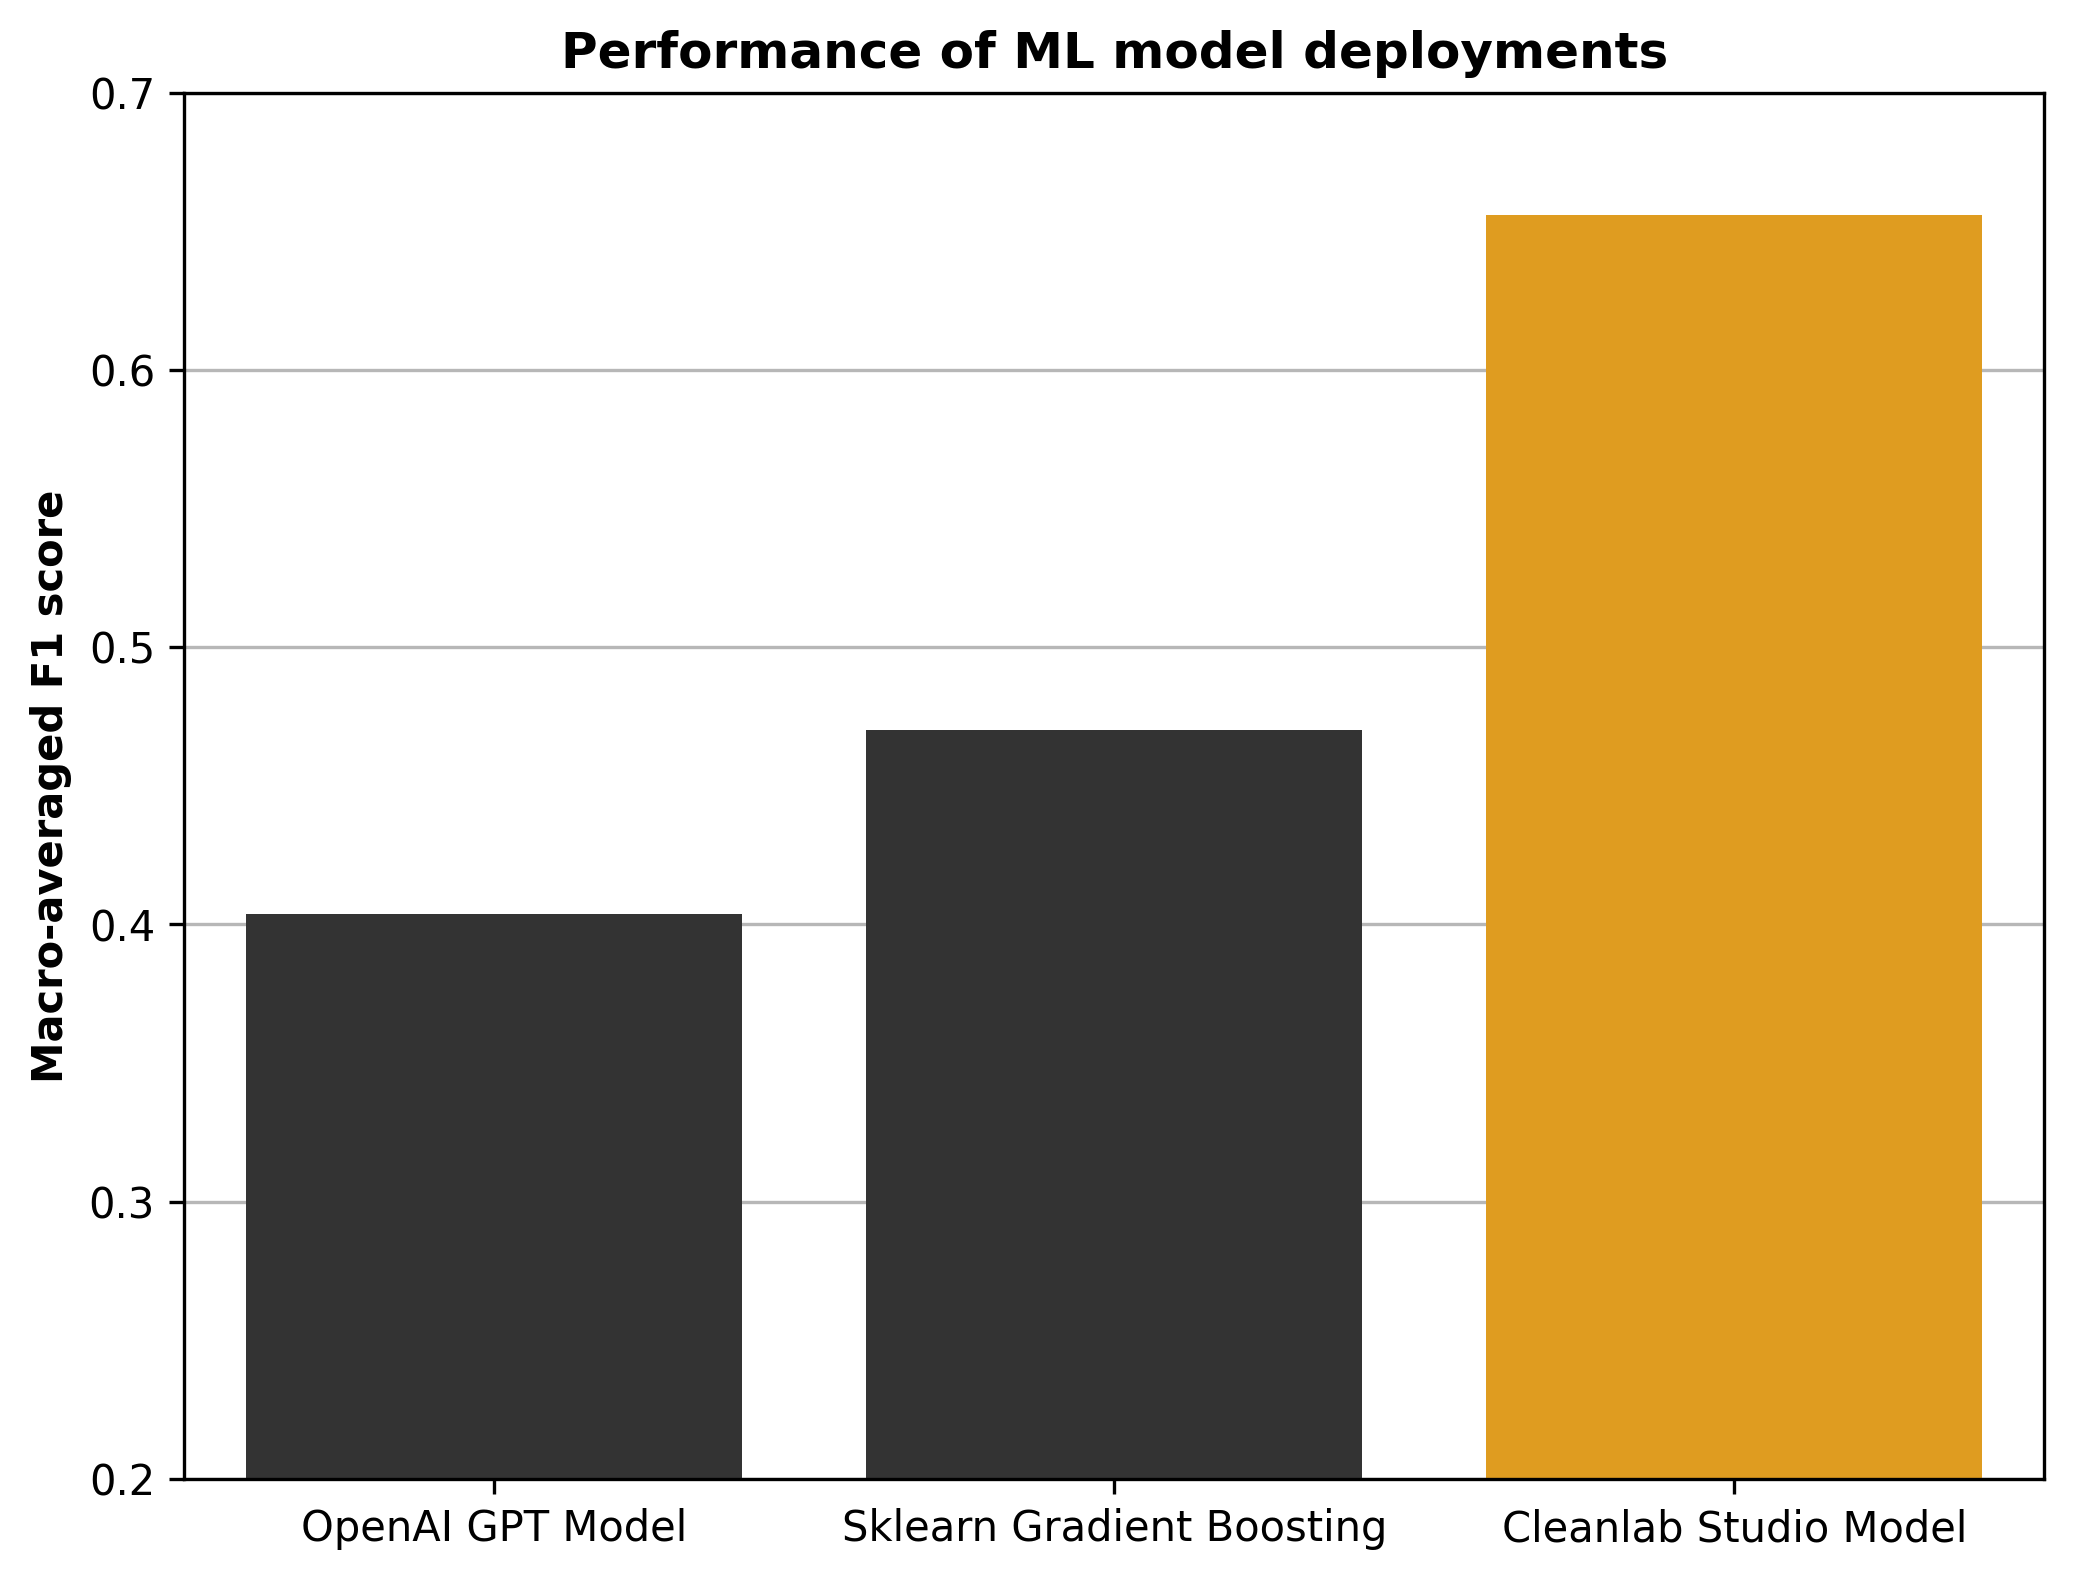
After we have predictions, it is natural to assess how accurate they are for test data with available labels (ideally clean labels). Labels are available for the test data used here, so we evaluated the F1 score of the model predictions for each class, macro-averaging these scores over classes into an overall evaluation performance measure. This is a standard performance measure for multi-label classification tasks. We also separately trained a scikit-learn model on featurized text (same dataset as used for Cleanlab training) and evaluated its performance on the (same) test set, as well as evaluating the performance of a OpenAI GPT Large Language model used as a multi-label classifier. Here are the Macro F1 scores on the same test set achieved by three ML models – OpenAI, sklearn, and Cleanlab Studio.
